

Automation Testing Framework using Selenium WebDriver and Java : Day 2


In the last article, we created a Maven project, added required dependencies to the POM.xml file and then added packages and folders to our project structure.
1. Initializing the properties file :
The config.properties file we added under src/test/resources/config folder, will have all the configuration related properties, such as browser name, application url, username, password etc.
We will add a method to read all these properties.
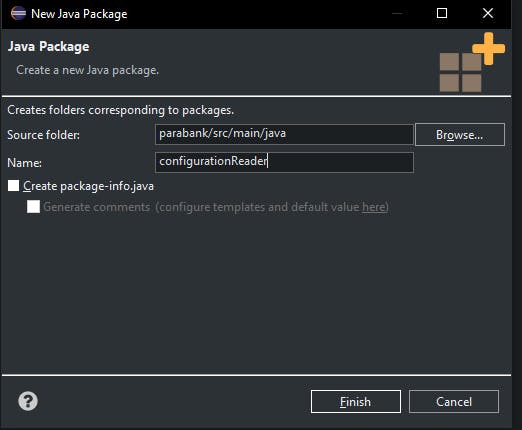
Here, we are adding a class named ConfigurationReader, which will have method that will initialize and return properties of config.properties file :
package configurationReader;

import java.io.FileInputStream;
import java.io.FileNotFoundException;
import java.io.IOException;
import java.util.Properties;
public class ConfigurationReader {
    private Properties properties;
    public Properties initProperties() {
        properties = new Properties();
        try {
            FileInputStream input = new FileInputStream("./src/test/resources/config/config.properties");
            properties.load(input);
        } catch (FileNotFoundException e) {
            e.printStackTrace();
        } catch (IOException e) {
            e.printStackTrace();
        }
        return properties;
    }
}
2. Initializing WebDriver and Launching browser:
We will need a method which will initialize the WebDriver and launch the browser on the basis of the browser provided in config.properties file :
package driverfactory;
import java.util.Properties;
import org.openqa.selenium.WebDriver;
import org.openqa.selenium.chrome.ChromeDriver;
import org.openqa.selenium.edge.EdgeDriver;
import org.openqa.selenium.firefox.FirefoxDriver;

public class DriverManager {
    private WebDriver driver;

    public WebDriver initDriver(Properties properties) {
        String browser = properties.getProperty("browser");
        System.out.println("Launching browser... " + browser);
        switch (browser.toLowerCase()) {
        case "chrome":
            driver = new ChromeDriver();
            break;
        case "edge":
            driver = new EdgeDriver();
            break;
        case "firefox":
            driver = new FirefoxDriver();
            break;
        default:
            System.out.println("Please provide a correct browser name..");
            break;
        }
        driver.get(properties.getProperty("url"));
        driver.manage().window().maximize();
        driver.manage().deleteAllCookies();
        return driver;
    }
}
We will update this method in upcoming chapters when we will apply the ThreadLocal concept to WebDriver for parallel execution of tests. We will also add code which will enable the remote execution of tests, taking screenshots of failed tests etc.
3. Defining @BeforeTest and @AfterTest annotated methods :
When we run the test methods, we need the properties and driver to be initialized. We will add a setup method under @BeforeTest, which will be the starting point of our test execution.
package basetest;
import java.util.Properties;
import org.openqa.selenium.WebDriver;
import org.testng.annotations.AfterTest;
import org.testng.annotations.BeforeTest;

import configurationReader.ConfigurationReader;
import driverfactory.DriverManager;
import pages.RegistrationPage;
public class BaseTest {
    DriverManager driverManager;
    WebDriver driver;
    ConfigurationReader configReader;
    Properties properties;
    protected RegistrationPage registrationPage;

    @BeforeTest
    public void setup() {
        configReader = new ConfigurationReader();
        properties = configReader.initProperties();
        driverManager = new DriverManager();
        driver = driverManager.initDriver(properties);
        registrationPage = new RegistrationPage(driver);
    }

    @AfterTest
    public void teardown() {
        driver.quit();
    }
}
Every test class in our framework will be exetnding the BaseTest class. We will update the setup method further, when we want to pass parameters from the testng.xml test runner file.
4. Adding first page class :
Let's add a page class as RegistrationPage under pages package. Every page class will have its own WebDriver reference. When we run a test from a test class, the BaseTest setup method will be invoked first, as it is defined with @BeforeTest. Thus, it will initialize the driver, and its current value will be passed to the driver reference of RegistrationPage class constructor.
package pages;
import org.openqa.selenium.By;
import org.openqa.selenium.WebDriver;

public class RegistrationPage {
    public WebDriver driver;
    public RegistrationPage(WebDriver driver) {
        this.driver = driver;
    }
    //private By locators:
    private By registrationLink = By.linkText("Register");

    //public page actions:
    public boolean isRegisterLinkAvailable() {
        return driver.findElement(registrationLink).isDisplayed();
    }
}
Here we have added a simple method, which will return true/false if the Register link in available on the page or not.

5. Adding the test class :
We will a test class named ResgistrationPageTest under tests package. As a best practice, the test classes and methods should not have any WebDriver related code. It should have only assertions. And page actions/methods in a page class should generally return something that is verifiable in the respective test class.
package tests;
import org.testng.Assert;
import org.testng.annotations.Test;
import basetest.BaseTest;

public class RegistrationPageTest extends BaseTest{

    @Test
    public void registrationTest() {
        Assert.assertTrue(registrationPage.isRegisterLinkAvailable());
    }
}
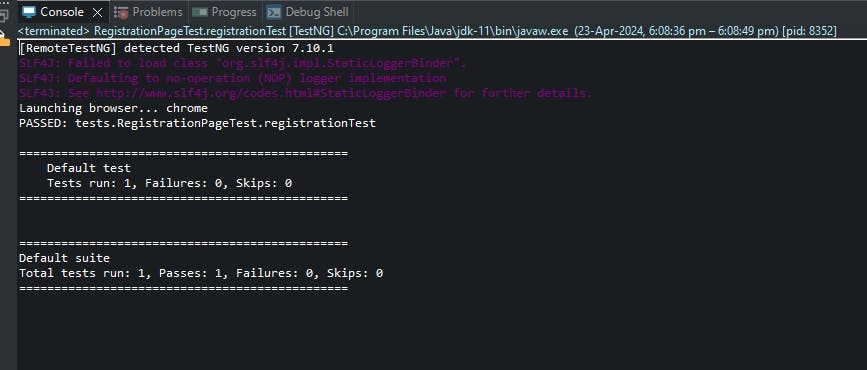
Right click on the test method and Run As TestNG test. The browser should be launched and below should be the console output :
In the next article, we will add the registration functionality test. Also, we will add a testng.xml runner file to run our tests.